
As part of my recent post about sharing my UXR templates, one of those templates is called the Gap Analysis template. I’ve noticed that for many UXR’s and UX Designers, a gap analysis is something they’re not too familiar with and so I want to use this article to give you a how-to on utilizing the gap analysis in your work as a UX’er.
What is a gap analysis?
A gap analysis is a UX Research method that helps you identify the gaps between a user’s needs and their experience with your product or service. This is a useful method in the exploratory phase of research when you are looking to find opportunities for design improvements by highlighting areas that are lacking in a good UX.
A gap analysis is also a great way to work together between UX designers and UX researchers. For example, while a researcher is performing interviews, surveys, usability testing, or analytics, the designer can start to collect the flow of the product or feature that you’re trying to analyse. By bringing the research together with the design it becomes easier to find the gaps.
Getting started
Let’s first start by downloading the gap analysis template I’ve uploaded on Notion. Then we start with the project overview (image 1) Fill in your problem statement here and the reason for the gap analysis. For the sake of an explanation of the method, we will use the following problem.
Our users seem to struggle with fulfilling orders on consoles for physical products. It seems they drop off when they have to enter their first and last name into the system.
Based on your research plan you will have a clear idea of your hypotheses, goals, and related research questions. Your goals for a gap analysis are highly likely to be something along the lines of understanding the gaps, and/or improving the UX of the product, service, or feature.
Tools
Next up is deciding which tools you will be using for this process. I like to work in Figma as that’s where our designers are already working and it’s a great tool for cooperatively working on the analysis of the gaps. The gap analysis template for Figma can be downloaded from the Figma community.
But you can always use different tools to work with, such as Miro, or Notion. If you don’t want to use Figma or prefer a different tool then that’s totally okay. Use whatever tool you feel most comfortable with while also making sure your team members can work with the same tool with you.
Setting up the gap analysis
If you choose to use the Figma gap analysis template, you can skip the parts about setting it up. However, the following paragraphs do provide more insights into what to do for each step. Figma explains these briefly, but this article provides more examples and insights into the application of the gap analysis. And for those of you who use a different tool, here’s a nice step-by-step for setting up your gap analysis.
Step 1: Focus Area
First, identify the focus area of this gap analysis (image 2). These can be directly derived from your hypotheses. For example, your hypothesis is: The user needs to be able to fill in their first and last name when ordering a product from our webshop. When we turn this into a focus area we could use. Availability of first and last name input fields.

Step 2: Current states
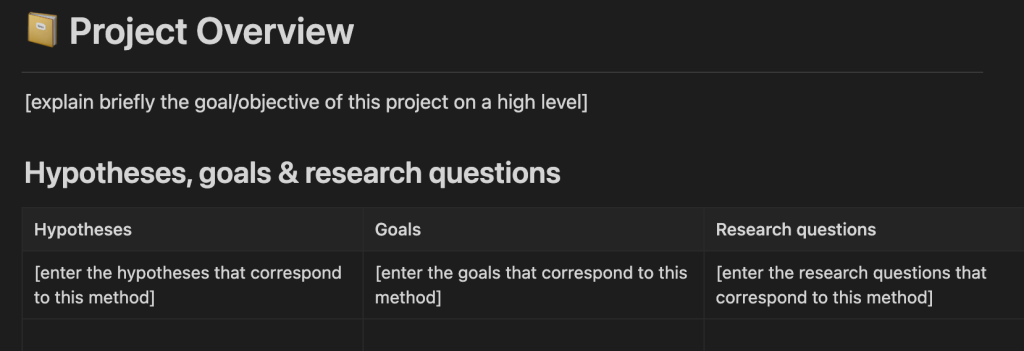
Second is the identification of the current state of your product. You look at the product as it is now and will make screenshots of all the pages, modals, etc where your focus area appears. So in the case of the focus area example: The availability of first and last name input fields. You’ll look at all the pages, modals, etc where the first and last name input fields are and are not used within the workflow that you are investigating.
Step 2.1 Incorporating UX research in the gap analysis
Say the UX researcher has already done research on the side, for example, analytics on those pages you have highlighted. Then now is a good time to start adding your research findings to that same page (image 3).
Step 3: preferred state
Next up is describing the preferred state of the gap analysis. This is where you start looking at what the ideal UX would be for the user. You know the focus area, you know the gaps, so where does this product or feature need to get to provide the user with a good UX?
To do this we use 2 methods. First up is bloom’s revised taxonomy (image 4). We use Bloom’s taxonomy because it is a teaching framework. It shows that users learn in phases, starting from simple knowledge all the way to being able to use that knowledge to create new things. In our focus area example: Availability of first and last name input fields, we want to be able to teach users what a first and last name is (simple for someone to learn) all the way to input that into an input field knowing that this information will be used on a shipping label and thus the order will be addressed to the right receiver. This sounds simple, but learning these things can be complex for users. To define the preferred state we look at each of the steps of blooms taxonomy, starting with (1) remember, (2) understand, (3) apply, (4) analyse, (5) evaluate and (6) create.
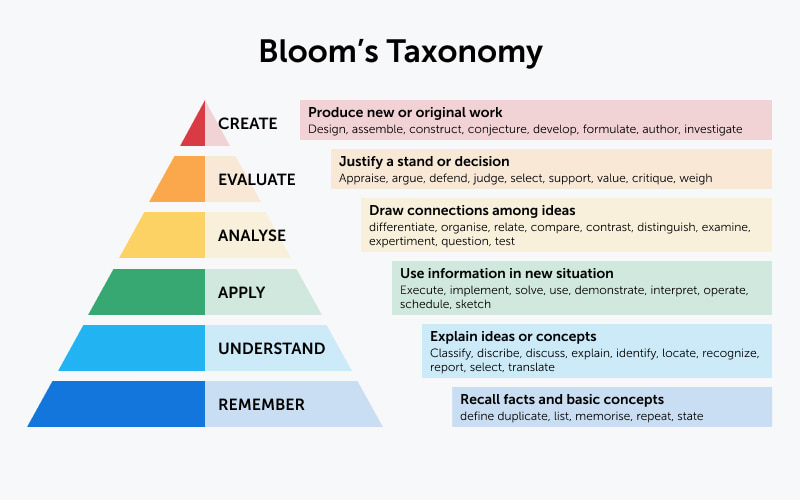
Remember & understand
Start by working on the first 2, remember and understand. These are, in essence, simple for people to do. They need to remember and understand the knowledge that they have or need to learn. In our example that would be: what is a first and last name?
Apply & analyse
Then look at apply and analyse. This is where the user has to use that knowledge that they have and apply it to a new situation, they need to be able to differentiate where that information goes and how its organised. The user needs to perform an action to be able to do so, which is one step higher in the chain of learning. In our example that would be: how do I input my first and last name?
Create & Evaluate
Then lastly we look at create and evaluate. These are the highest up on the chain of learning. In these two, the user has to not only have the knowledge and act on it but also understand the consequences of these actions. Such as knowing what happens when the user, uses the knowledge in new situations. So in our example, that would be: what is someone else going to do with this information? or How will this information be used after I’ve inputted this?
Step 3.1 Incorporating UX research in the gap analysis
To properly create these steps in your gap analysis, it’s very useful to already have research-ready. Say from interviews, usability tests, or analytics. Perhaps in interviews, users have stated that they don’t like filling in last names, or that they like to use a different name. Knowing this from your users can help you identify what information users need (remember/understand). Perhaps you’ve run a usability test and found out that using a keyboard on a gaming console is really hard for users and thus takes up a lot of time. This could help with the apply and analysis part, by now knowing that users want to spend less time inputting their information. Perhaps the ideal state here is that these fields get auto-filled based on their gamer profile. And so on. So the combination of research with Bloom’s taxonomy makes for a strong gap identification.
Step 4: Define the gaps
The next step in the gap analysis is the definition of the gaps. This is where we look at what is missing in our current project which causes your user not to reach the desired states. You use the current states and put them side by side with the preferred states and then look at what is missing. For this, I like to use the theory of Dirksen’s 5 common gaps in learning. This one closely connects to Bloom’s taxonomy but focuses on gaps in the user’s learning experience. There are 5 types of gaps that we will define in this phase: (1) knowledge gaps, (2) skill gaps, (3) motivation or attitude gaps, (4) environmental gaps, and (5) communication gaps.

Knowledge gaps
For this section, we look at what information the user is missing to perform the required task. This is a knowledge gap so you can look back at the first 2 sections of Bloom’s taxonomy of the preferred state and see what knowledge the user is missing to perform his task. For our example that would be: what information is the user missing to be able to understand what a first and last name is?
Skill gaps
For this section, we take a look at our user’s skills. When we are using the gap analysis for a digital product we look at the user’s skills with technology. During the research phase, it is highly likely that you’ve learned something about the skills of your users.
In the case of our example (performing an order on the console) perhaps we have learned that typing in letters with a controller onto the tv screen is incredibly time-consuming, prone to errors, and leads to frustration among users. When it comes to the skill gap the reason behind this becomes interesting. Perhaps the user turned out to be an older generation and they don’t connect the letters on the screen with a stick to find the letters. Perhaps they’re not too tech-savvy.

Motivation or attitude gaps
This section strives to understand what causes disinterest or a lack of motivation in performing the required task. It looks at the UX experience and what is breaking that experience.
For our example, we could’ve learned during research that the user is well versed in ordering products from a webshop from their phone or laptop. Perhaps there they’ve saved all their info to their profile and it takes them 2 clicks and 1 minute to complete the ordering process. And when we look at our example, we see a 10min ordering process and 52 clicks. The fact that the ordering process on the console costs 10 minutes versus 2 on mobile could indeed be what causes a lack of motivation in performing the task.
Environmental gaps
next up are the environmental gaps. This is where we identify the parts of the context that are unclear to the user which is causing them to feel left unsupported. When we think about the context in a digital product we think about the place where everything happens; the screen, the controller, the copy that the user reads, the design the user looks at, and the steps they take to perform the task.
In our problem statement what we may have identified during UX research is that our elderly users have trouble reading the letters on the screen, perhaps they use the X button thinking that will let them continue but instead it erases their form. All of these experiences could cause gaps in the environment of the user. Perhaps there are spelling errors, and labels that don’t make sense, all of these environmental issues found during the research phase could help you identify the gap between the current state and the preferred state.
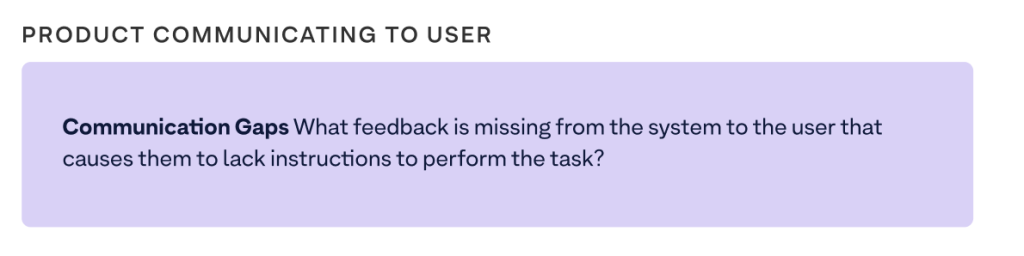
Communication gaps
Last, but definitely not least are the gaps in communication. This is where we take a look at how the product communicates to the user. What feedback is missing from the product to the user that causes them to lack instructions to perform the task?
Perhaps during research, we learned that when a form gets erased, a user is not notified and thus left confused and frustrated. Perhaps we learned that the controller shakes heavily at the user when an error is made, but nothing happens on the screen and so the user is unsure of why the controller is vibrating in their hands. These are all examples of gaps in communication that can cause the user not to reach the preferred state.
Step 5: Define your solutions
The favorite part of any UX designer is of course to start brainstorming solutions. This is the phase in which they can finally use all of the research found and do just that. To do that you have to summarise the findings for each focus area of your research by summing up the preferred state and the gaps. Then you can write the conclusion on what needs to be done to close the gap and reach that preferred state. You can do so in a descriptive manner or sketch ideas you might get from these findings.
Conclusion
And that’s it, now you have successfully performed a gap analysis and combined UX Design and UX Research in the process. A gap analysis is incredibly useful to identify design opportunities while synthesizing research findings. And it’s a great UXR method that allows the designer to work side by side with the researcher on solution generation.