Notion, the productivity and note-taking web application that has become increasingly popular among UX’ers and product managers worldwide is also used by me as a UX Research repository. In this article, I’d like to show you what I’ve done, how I’ve set everything up in Notion, and share my experiences. After reading this article you can also start using Notion as your repository.
Let’s dive right in as I safely assume that you’re reading this because you are already familiar with Notion and have an account there. You’re just not quite sure how to use it for your UX Research repo.
The UX Research repository.
A UX research repository is a centralized database where teams can store, manage, and access all the data and insights from UX research projects. Having a UX research repo is beneficial because of the following reasons:
- Accessibility: it ensures that all the information is easily accessible to you, your team, and the stakeholders involved in these projects. .
- Usability: organizing research data enhances usability, making it easier to utilize insights cross-project.
- Knowledge preservation: A UX repository stores the knowledge for you, thus preserving it and ensuring that past insights can still be utilized for present and future projects.
- Efficiency: a well-organized repo also saves you time and resources by preventing data and insights from being (wrongly) duplicated
- Data storage: a UX research repository can store all types of UXR methods, such as user interviews and their respective videos, transcripts and analyses, usability tests, analytics, survey data etc.
- Insights: Storing all insights can give you a huge database of information on your users and your product which can then be used for other projects.
What to keep in mind when crafting the taxonomy for your UXR repo?
- Collaborate with the people who will be using your repo to understand their needs when it comes to viewing data, filtering down projects, etc.
- Define the common terminology so everyone understands what is being spoken about. You can discuss this with stakeholders and document it so everyone is aware of your terminology.
- Develop a logical hierarchical structure to make it user-friendly to find the projects you need. I’ll show you what I’ve done, but every company and its users are different so make sure to adapt it to fit the needs of yours.
- Develop a tagging or labeling system to make filtering and narrowing down your projects easier. In the next paragraph, I’ll walk you through mine, but it’s a good idea to work together with your stakeholders to identify their needs for filtering.
Key components of my UX research repository
Now that we know why a UX research repository is useful, let’s look at what components could go into a UXR repository.
1. The filters
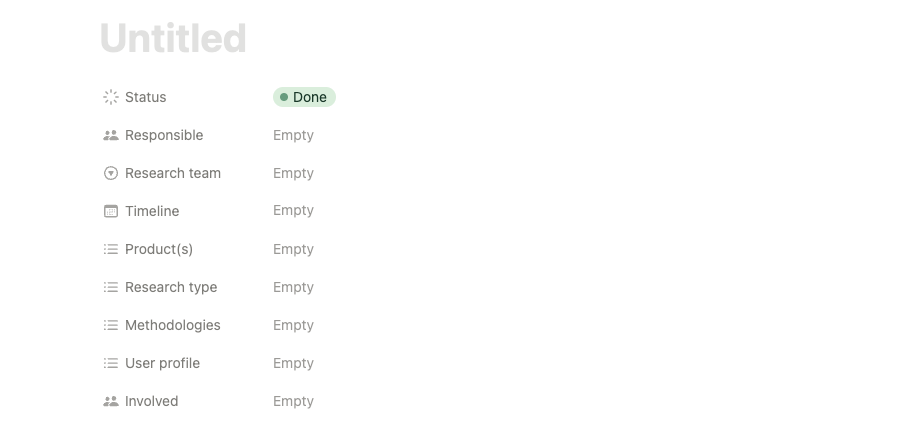
Notion gives us the opportunity to set up files with different properties. These properties can then be used to filter within your files. Which is a super useful feature in your repo. See an image of an example of mine below. I’ll briefly walk you through each of these.
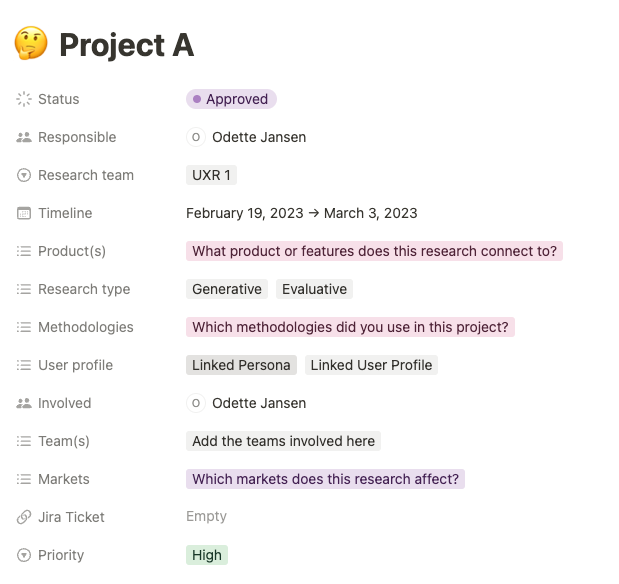
- Title: Give your project a clear name that makes it easy to understand what this project is about without it becoming a big essay.
- Status: What is the status of this project? I use Notion not only as a UXR repo but also as a status board so we can quickly see which projects are approved, in progress, canceled, paused, or done. Doing this will allow other users to quickly see if projects are ready to be used elsewhere, if data might still be coming or why a project got canceled.
- Responsible: This property highlights the main UX researchers responsible for the project. Sort of like the product owner of the project. This is the person you should go to with questions about this project.
- Research Team: The repo I built is used not only to story UX research but also legal and market research. So I’ve developed this property to make a distinction between the research teams so users can quickly see what team did the research and thus what it is about.
- Timeline: Timelines, or dates are important to add for several reasons. 1. it keeps your data relevant (you shouldn’t use insights from more than 5 years ago) and 2. it makes it easy to filter on newest first but also to sunset the research that is no longer relevant.
- Products: This property allows you to highlight which feature, product or product part the research is about. For example: adding a label here for a settings feature allows you to use that filter to quickly narrow down your repo to any projects related to that feature.
- Research type: This property allows you to select between generative and evaluative research. This too allows for smoother filtering as you know you either want to explore the problem space for a feature or check the insights from the last evaluation.
- Methodologies: In this property you highlight which were the methodologies used, such as user interviews, card sorting, diary studies etc. This will allow you to quickly identify which method was used to know what data it produced.
- User profiles: Understanding our users is key in UX research, having user profiles (or the less popular form of personas) with clear motivations and behavior patterns can help you link research and filter on user profiles as well.
- Involved: You never run a research project alone and so there are always other people involved that have a role in the project. Here you add UX Designers, PM’s, Devs and other stakeholders involved.
- Team(s): at many companies there are smaller product teams who are responsible for parts of the product or a specific user profile. You can use this property to highlight which team(s) this project belongs too.
- Markets: For those of you working internationally, this property allows you to filter down on what market the research project belongs too. Be that all markets, or only a select set, such as the Nordics or BeNeLux
- Jira ticket: If you work with Jira, or a similar tool then you can link your jira ticket here. You wont necessarily use this to filter down but it makes it easier to update the jira ticket while working on the project.
- Priority: Because I also use the repo as an overview with projects for the year I’ve created a priority filter so the user knows which projects have precedence over others.
The project specific overview page
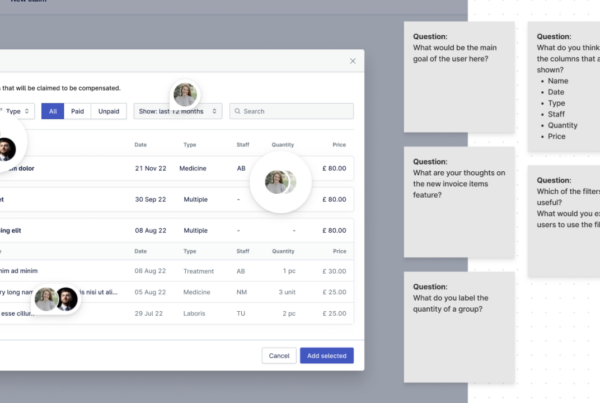
The overview page of any UXR project is also very important as it highlights the most important information needed by a user to determine if that is the project they’re looking at. I’ll explain the sections below the image.
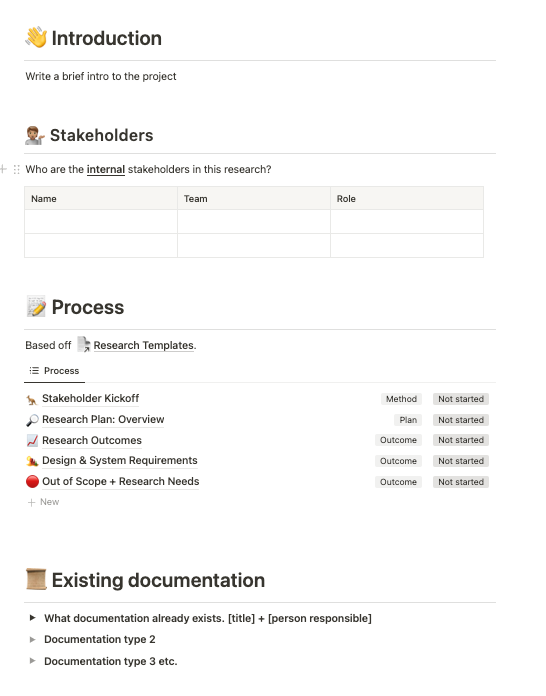
- Introduction: Quickly describe what this project is about and what can be found if diving deeper into this project. Keep it short so it’s quickly to digest and helps the user decide if they’re on the right project
- Stakeholders: list your stakeholders here. Again this serves as an overview of who was involved and what their roles were in this project.
- Process: this is where the magic happens. The pages you see here are the ones I use in each project and can be found in my UX research templates library in Notion (also free). These ensure the same process for each project and clear documentation on findings.
- Existing documentation: This is where you can link back to previous research but also documentation and videos made by stakeholders. For example: we often have PM’s explaining certain features so we know what the project is about. These videos can be linked here for easy reference.
The UXR repo overview
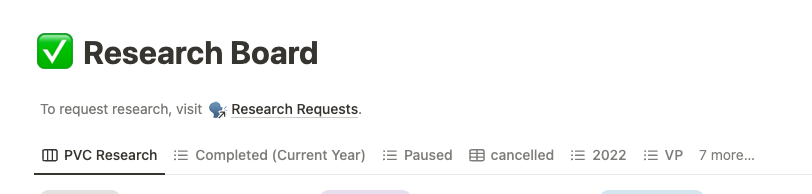
Below is an image of my UXR repo board. This highlights quickly the statuses of the projects. Notion allows you to completely personalise this using the filters Ive mentioned above.

I prefer this view of a sort of scrum board, but you can also make a layout of a list, table, timeline, calendar and gallery (although gallery is pretty useless for a repo)
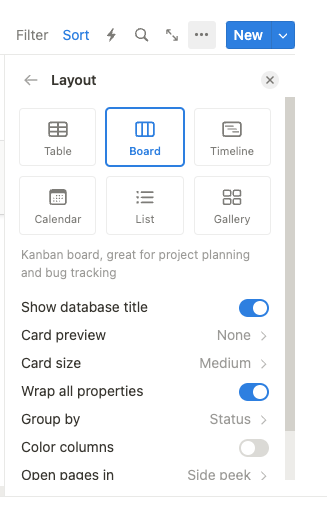
You can also preset a bunch of views. For example per product team or per status so each team knows exactly what is happening to all projects involved.
Conclusion
And that’s it. Now you have an idea of how Notion could be used for a research repository. Even though there are many valid repo options out there, Notion to me does the job swimmingly. So if you too want to use Notion you can check out my free template for a UXR Repo on Notion. Feel free to duplicate it and adapt it to your needs. Let me know what you’ve used, changed, and what worked well for you.